libertylogo2.gif

Reeses Trailer Hitch Install

Home
2006 Recall List
2005 Recall List
2004 recall list
Article Page
Jeep liberty Owners Group
Maintance for jeep Liberty
KJ Jeep Country Forums
Problem Questions and Answers
Jeep Liberty trans mission problems forum
Reviews Page
Off Road 4x4 Basics
Off Road Check List
Off Road for beginners
Snow Safety
Photo Album Page
Mailbag
Contact Me
NewYork City Jeep Club
Up Coming Projects
Batteries Check

The Reeses Trailer Hitch Install :
For My 2004 Jeep Liberty This Trailer Hitch was Pretty simple to place on . The body Frame of the Liberty already has the Bolts Holes in the Frame , so it is a basic Simple Install.

res37042003.jpg

To get Started : I got the
Class III
Multi fit; 5000 lb. gross trailer weight/6000 lb. weight distributing; 500 lb. tongue weight/600 lb. weight distributing; install time 30 min.;
From AutoZone Reeses power Tow

It says it,s easy only 30 minutes . give yourself alittle more time , The bolts take a bull to turn . but after it,s installed .. it will be Solid ...say 2 hours .. with inspection to make sure everything is right..

OK lets get Started ,, I would take the time to read the intruction i know i don,t need no stinkin booklet to show me .. but Read it anyway ,,,
1 . get down under your Car look up at the Frame of the jeep You will Notice Four Bolt hole already there , ((( with a skid plate over gas tank there will be Bolts in the 2 Back Holes )) Its pretty easy to Notice once your Lookin up at the frame . Ok now you know where the brackets have to go ,,
 
2. get your Instructions look up the lay out for your year and model .. once you have this page lay the book down in back of the jeep ,, you will Notice that the Diagram is almost exact as your going to Install ,,,
 
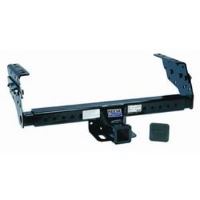
3. The Brackets have a curved End and a Pointed end .. Make sure the Point side Faces to the back of the car , Look at the Diagram they will match . ok lay them on the ground just the way they are surpose to go up , this way all you have to do is reach for them ,, they will be pointing the right way ,,
 
4. Take One bracket and do a dry Fit ,, Notice how the Holes in the Bracket Fits to the holes in the frame ..
 
5 . There are many Bolts in the Package . Find Four Bolts that fit into the Car frame Bolt holes .. They are silver in color ,, have the Numbers 808 on them ,
 
6. Ok now you have the four Bolts ,, Now we need to Find the right Spacers Washer ,, there is 2 Thick Square Washers 2 Meduim Thick and 2 wedged Spaces .
 
The THick square Spaces go in the to holes on each side Closest to the back Bumper .
The Med and wedged go in the back closest to the gas tank ..
 
7. Once you have them , now it time to Mount the brackets . (( just a reminder if you place the bolts without the square spacers the bolts will only titen so far ,, ))
 
LIne up your bracket holes to the frame holes .. Take the Thickness square space and place your 808 marked  bolt into it ... and place the bolts into the closest hole to the back bumper .. just get the bolt in to hold up the bracket .. (((( the square spacer washer goes on top of the Bracket not under it ))so it will be like this bracket ,Spacer Washer , Bolt ..
 
In the Front most Holes ((( by the gas tank )) goes the medium Spacer Washer with the wedge spacer washer .. place the bolt threw the 2 spacer washers .. Line up your bracket , insert you bolts with the meduim square washer and the wedge spacer ... Turn the bolts till it holds up the bracket ..


8 . Now Get Out your 19 MM socket with your rachet wrench Plan on working hard to get theses in . But to make the turning easyier use a breaker bar , If not get Ready to Bull them Bolts up Into the Car Frame .. WE actually Rocked the car while Bulling theses bolts in ! turn the bolts till the brackets are solid !!

9 . you look worn out ,,, go get a Drink !!! LOL

Time to Asemble the Hitch Bar , In the Box you will see 2 wired strands with coils ., PusH the wires threw the Middle holes of the Bar (( check the Instruction to make sure yours show the same ) let them come out the Holes of the Hitch bar ,, The Screws for the bar is the 4 smallest bolt (( round head Not Scew heads )) Now in the package is 4 Square holder that go inside the bar to hold the Bolts . place the hole of the square Holder over the coils then screw your Bolts into the Coiled end of the Wires ,, pull on the wire the screw will goto the Hole and pops out ,,  ..make sure to hold the tip of the bolts sticking out ,, place a lock washer and Nut ,,,, titen , do the same on the other side , 2 bolts on each side ..((one in back and one in front)) make sure you look at the Instructions here , the instrustion will show you which holes for the bolts ,,

Ok time to set the Hitch bar into the Brackets !!
 
Try to have Some one help you here the bars are heavy and if they come down on you they will hurt ..Bad!! ((( Trust Me here... OUch!!! )))
 
1, in The Bolt pack is 6 Bolts with spines on them get theses bolts with lock nuts and Nuts .
2. Lifted the hitch bar up into the bracket hold it there !! and place in one bolt . then a lock washer then Nuts .. This will hold one side up now do the same on the other side .. Place in the other 4 bolts (( 3 on each side )))
3. The bolts are designed to mash as you turn the nuts ,, use plenty of force when turning the bolts and don,t stop till they don,t turn no more .. Once you have theses bolts set . your hitch is installed ..


Inspect YOur HItch by making sure Every Bolts is Tite !!! i mean Tite !! if there is any Movment then one of your Bolts is loose !!

Placing the Wire Harness is Coming Soon !

I got MY Reeses Hitch From My Sons as a Gift , but the Cost was About $119.00 at Autozone !!

autozone_logo_new.gif
MY Hitch was Purchased at AutoZone

This How TO was BY JohnnyDice 

Awesome Car Polish !!
5ss_slip_when_wet_bnr.gif
Never Wax Again !